Wednesday, June 3, 2020

CSA Excitement

Have you ever thought about joining a CSA (Community Supported Agriculture) but didn't know where to start?  I have probably considered this every Spring for the last 3-4 years.  This year, with all that is going on with Covid-19 and the uncertainty of the immediate future, I decided to take the leap.  I was driving by Solly Brother's Farm one day and saw a sign outside advertising their CSA.  The rest of my drive home was spent weighing the pros and cons of a CSA in an attempt at coming up with a way of convincing my husband that we should really spend such a large chunk of money in such an uncertain time.  To my surprise, I barely started to present my case when he all of a sudden shrugged his shoulders and said, "okay".  That's it??  Just ok??  I didn't have to convince him why this was a good idea?


Just to give a little bit of background, I'm a work from home mom with a lot of mental time on my hands.  I probably think up a million "great ideas" every day.  Only about 1-2 of them ever make it past my internal filter to actually be presented to anyone outside my cranium and even then I'm usually met with skepticism.  So for him to be so on board so easily?  I though for sure he was coming down with this new plague.  So with his blessing, I stopped by the farm and donned my face mask to sign up.  The whole process was super easy.  I just gave them my name and contact information and paid for the season.  Then I went home to wait for about 4 weeks.

Today is the day I've been waiting for.  Today is the first pick up day of the season.  Just as I was getting ready to load all the kids in the truck and drive over to pick up my glorious prize for patience, Mother Nature had a different plan.  Dark grey skies, 80 mile per hour winds, and rain coming down in buckets.  We decided to wait it out.  Which was good because about an hour later, the sun came back out and we were able to go claim our basket of goodies.

Now, our CSA sent out this handy little reminder email this morning so that I didn't forget today was pick up day.  It's like they already know me.  My mind is a sieve.  My phone has alarms set for approximately 15 minutes prior to literally everything that happens in my life.  But I digress.  In addition to the handy reminder, their email also gave me a list of everything that I could expect to find in my basket this week and 3 recipes on what to make with it.  I expect to find these included lists and recipes to be extremely helpful later in the season when I am finding unidentifiable (to me) veggies that I don't know what to do with.

This was another reason why I really wanted to join a CSA this year.  I don't know about you, but I am so incredibly tired of making the same meals every day.  My boys are 10, 7, and 3 and I'm pretty sure they are made of 50% macaroni and 50% cheese.  Ok, there may be some chocolate milk, ice cream, and chicken nuggets in there.  But really, their tastebuds are so boring!  I needed some variety in my life and having different fruits and veggies forced on me every week is just the motivation I was looking for.  So, without further ado,  I present to you CSA Basket #1:

Isn't she beautiful?  

To be honest, when I was reading the email from the CSA they kept referring to the basket of produce that was coming my way,  I kept thinking surely they are just calling it that to make it sound cute and fun.  It has to be coming in some used cardboard box or something.  But no, it really did come in this adorable market basket.  Next week, we will return this basket in exchange for our new one full of goodies.  To be fair, there is a lot of green in the basket this week and not all of it is fresh edible produce but it's only week one, and very early in the growing season.  So what did we receive this week?  


This just screams Spring!

Here is this weeks bounty, in all her glory!  Kale, spinach, asparagus, strawberries, 2 geranium flowers, a freshly baked pound cake, and some homemade strawberry butter.  The recipes that were provided were for Strawberry Shortcake, Easy Roasted Asparagus, and Spinach and Kale Quiche.  I will post more about those recipes after we try them.  Until then, check out some closeups of all these delicious treats.


Strawberry butter and pound cake
Quart of freshly picked strawberries

Kale
This is apparently spinach.  I've never seen this variety before.

Asparagus
 Geraniums!  I can't wait to see what color they will be.

Wednesday, June 10, 2015

WARNING, LITTLE BOYS ARE GROSS AND THIS STORY HAS LOTS OF POO IN IT.  PROCEED WITH CAUTION.

Life in the Hen House is never boring.  Today I went to change Jack's diaper before putting him down for a nap, only to find out that he did not have a diaper on!  I asked him where his diaper was.  His response?  "I dunno."  I yelled downstairs to Adam and asked where Jack's diaper was.  He told me it was outside in the yard.  I noticed a little smear of poo on Jack's leg.  Oh dear!  I quickly wiped him up, put a fresh diaper on him, and changed his clothing.  Adam brought me Jack's diaper from outside.  No poo, not even wet.  Apparently Jack decided to take it off and pee outside.  Score one point for potty training???  I put Jack down for his nap and went outside to investigate.  What I found was no poo, anywhere.  Wait, is that poo I see across the yard.  Yep, but definitely not Jack's must be from the dog.  I scooped it up, threw it in the trash, and continued searching.  Just when I decided to give up on finding it (honestly I was grossed out and convinced that the dog ate it or something like that) I smelled poo.  I looked down at the patio and sure enough, there was Jack's poo, smeared all over.  I grabbed the garden hose and sprayed it all off into the grass.  Then I got to thinking, that poo was smeared on the patio.  But Jack didn't have it smeared all over him.  Oh God, what did they smear his poo around with???  Then it hit me, Adam had taken his sneakers off outside before coming in the house.  He NEVER takes his shoes off before coming inside, not even when they are caked with mud.  I checked, and sure enough, there was poo on the bottom of his sneaker.  I hosed his sneaker off, cleaned up the rest of the evidence, and all is right in the world again.  At least until the next exciting incident here at the Hen House.

Tuesday, April 30, 2013

Homemade Lotion

Jack has been suffering from a case of patchy dry skin for the last couple of weeks and we have tried quite a few different lotions, creams, oils, etc but nothing seems to have completely cured it.  Today at his 4 month checkup our family doctor looked at his skin and confirmed what we already suspected, he's got eczema.  Now here is where I would like to do a jig while hugging the bejeezus out of our family doctor.  Instead of prescribing a steroid or some other medicated cream, she suggested I make my own lotion to apply to his entire body.  She gave me the ingredients that she would recommend and said that I could find about a bazillion different recipes online.  In the back of my head there was a little bell going off the entire time she was talking about the simple ingredients for homemade lotion.  It wasn't until I got home and Googled it (or Tim-ed it like we say in our house but that's a totally different story) that I realized why that little bell was going off.  I had previously found a recipe for homemade lotion when I was looking for other homemade cleaning recipes.  Here is the recipe that I originally found for homemade lotion.  Below is my exact recipe that I tried.  Hopefully I will remember to come back and write an update on how it works for poor Jack's eczema.

Homemade Lotion Recipe

1/2 cup Extra Virgin Olive Oil
1/4 cup Organic Beeswax Pastiles
1/4 cup Organic Extra Virgin Coconut Oil
Approximately 2 tablespoons Organic Raw Cocoa Butter (I used a tablespoon measuring spoon as a guide and eyeballed the chunks of cocoa butter instead of grating it to measure it exact)

Add all ingredients to a quart size mason jar.  Place the lid on loosely.  Place jar in a small sauce pan filled about 2 inches with water.  Heat on the stove over medium heat.  As ingredients begin to melt, shake jar occasionally to mix ingredients together.  Once all of the ingredients are thoroughly mixed together, pour into whatever jar, tin, or other container you are planning to store it in.  The finished product will be too thick to use with a pump bottle so a tub or low jar works best for storing.  I used two small canning jars (4 oz each I believe) to keep one upstairs on the changing table and one downstairs in our diaper change basket and a little travel tin that I purchased at Target for in the diaper bag.  Just a warning, use this lotion sparingly.  A little goes a long way!


Friday, July 13, 2012

Claussen Pickle Clone Recipe


Ever since I posted some pictures of my homemade pickles on Facebook, I have been getting requests for my recipe.  Honestly, I can't really take credit for it.  I googled "Claussen Pickle Clone Recipe", looked through what came up, and picked one that sounded easy.  It worked.  My pickles taste very much like Claussen's.  Which mean's a lot considering that I'm a pregnant pickle snob.  (I've always loved pickles, not just since I've been pregnant.)  The recipe I used was actually for refrigerator pickles and I then canned some of the jars.  So here is the recipe that I used:

1 gallon cucumbers
1/3 cup dehydrated onions
6 garlic cloves (minced)
1 1/2 tsp. mustard seed
4 tsp. dill seed
1 1/2 quart water
2 cups cider vinegar
1/2 cup sea salt

Cut cucumbers into desired size. (halves, spears, chips, etc)
Put cucumbers into jars.
Boil liquids and seasonings for 5 minutes to dissolve salt.
Allow brine to cool.
Pour brine over pickles and let sit on counter for 3 days, turning occasionally.  (cover loosely with either cheese cloth or the lid of your canning jar to keep fruit flies out)
Then refrigerate.  They will keep for one year.

Note: I looked at some recipes for instructions on how to can these pickles since the original recipe was only for refrigerator pickles.  A lot of the recipes called for processing the jars for 10-15 minutes.  I did happen across one that was a Claussen clone recipe that said she only processed the jars for 5 minutes to keep the pickles from losing their crunch.  I followed the 5 minute recipe for canning my pickles.  We have only tried the refrigerated ones and not the canned ones so I can't guarantee how they will turn out when canned.  I will try to post an update once we start using the canned ones to let you know how they held up.

Saturday, July 23, 2011

What's for dinner tonight?

Tonight we had grilled french onion soup (yes, I made it on the grill!), homemade whole wheat bread, tossed salad, and grilled apples.  The grilled apples were exactly like baked apples with brown sugar and cinnamon except they were wrapped in foil and put on the grill.  Yummy!  Below is the recipe for the grilled french onion soup.  I found this recipe online at www.allrecipes.com.  There was a suggestion in the reviews to use foil tart pans and then wrap the whole thing in foil.  I used that method and it worked great for us.  I used the foil tart pans for the baked apples too and it made cleanup very easy.


Grilled French Onion Soup

Ingredients
  • 4 large Vidalia onions
  • 4 tablespoons butter
  • 4 cubes beef bouillon
  • 12 ice cubes
  • 4 tablespoons dry sherry
  • 1 pinch salt and pepper to taste
  • 4 slices provolone cheese
Directions
  1. Preheat the grill for medium-high heat.
  2. Slice the tops off of the onions, and remove the outer layer of skin. Leave the base intact. Cut slices across the top in a cross hatch pattern, going about 1/2 inch into the onion. Set each onion on a square of heavy duty aluminum foil. Double the foil if you do not have the heavy duty. Place 1 tablespoon of butter on top of each onion, then place one bouillon cube onto the butter. Fold the foil up around the onion. When almost closed, place 3 ice cubes on top of the onion, and spoon 1 tablespoon of the sherry into each packet. Seal completely.
  3. Place the packets on the grill, and cook for 40 to 45 minutes. Don't peek inside until the 40 minutes has passed. When the onions are cooked through, they will feel tender when you squeeze the packet. Open the foil up slightly, and place a slice of cheese on top of each one. Close the grill lid, and let the cheese melt into the onions for a minute.
  4. Remove from the grill, and serve from the packets, or remove the onions to a serving bowl, and pour the stock from the packets in with them.

Wednesday, October 27, 2010

Etsy Trick or Treat


I got this idea for a blog post from a friend of mine, Lindsay,  from  PA Country Crafts.  She did an Etsy Easter Egg hunt and I thought it was such a cute idea that I decided to do a Halloween version.

We'll start with a cute Trick or Treat bag from preciouspatterns. 


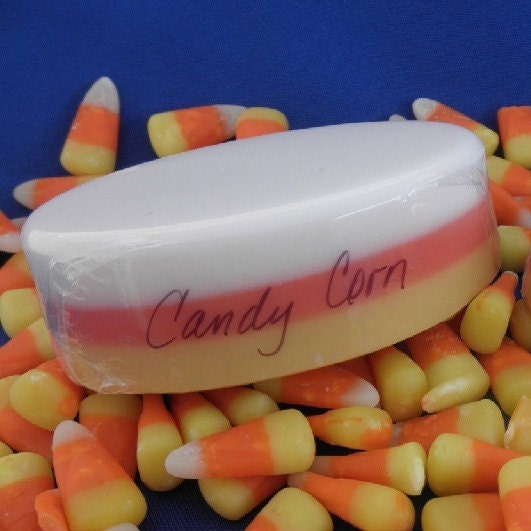
The first treat I found was this cute Candy Corn Soap from PureHeartSoap.


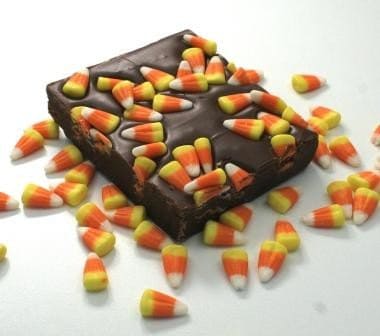
This Yummy Candy Corn Fudge treat is from reeaadd.


This very cute knitted set is from knittyknittybangbang.


How cute are these little Bat Trick or Treat Booties from HandyMandyCreations


The wine enthusiast in me just loves these Custom Halloween Wine Labels from smallcreatures.


Of course I have to add some items from some of my favorite Etsy shops.

Here are pumpkin decorations from my good friend, Lindsay, at PACountryCrafts.


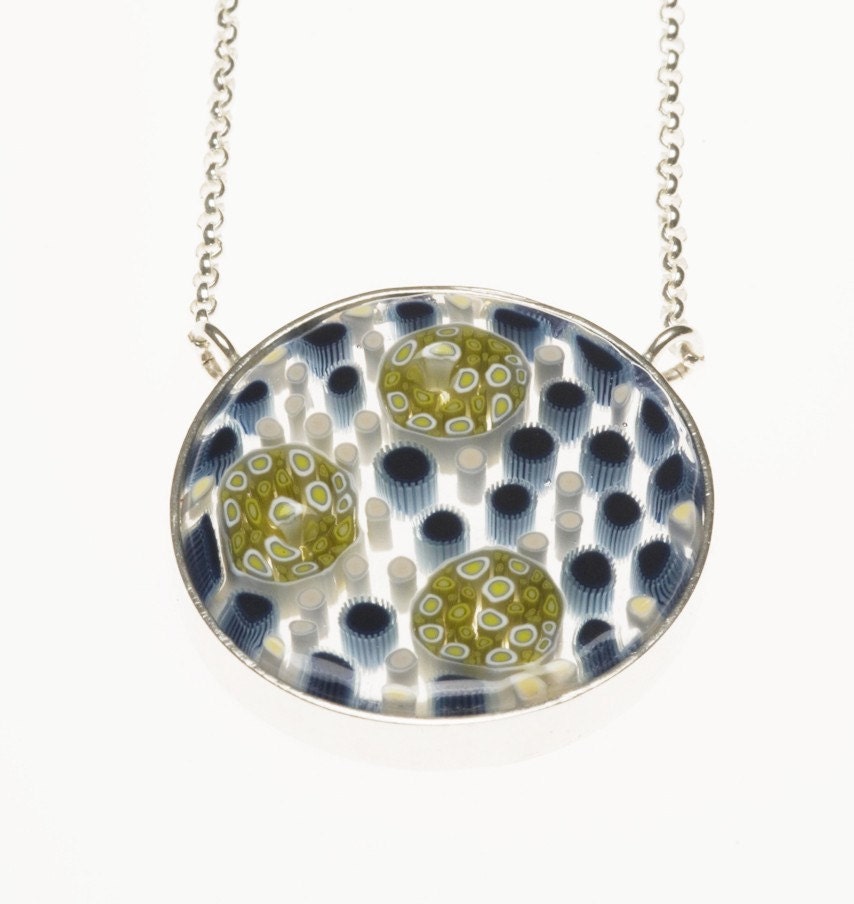
This beautiful necklace titled Weird Science from my friend, Penny, at spoton.


This one of a kind vase is from my friend Linda at littleflowerdesigns


I hope you all enjoyed Trick or Treating with me!  Stay tuned for more from the HenHouse!

Tuesday, October 12, 2010

What to do when you have a mason jar flap clogging your kitchen sink...

I know, this never happens to anyone.  In fact, I am probably the only person that this has ever happened to and it will probably never happen to me again so this information is probably never going to be useful ever again.  But, just in case you ever find yourself in the same predicament that I was in this afternoon, here is what to do.

First, let me describe what the scenario was.  I was doing the dishes this afternoon like a good housewife and realized that the water was not going down the drain.  So of course I do what I always do when this is the case.  I turned on the garbage disposal.  Like usual, I forgot to feel around in the drain first to make sure there were no spoons, etc. in the drain.  (That's how we are currently down one baby spoon but who's counting?)  Anyway, I didn't check first and apparently there was something in the drain but it was not a baby spoon this time.  So the garbage disposal sounded a little funny but not that crunchy grinding sound like you may be familiar with if you too forget to check first before turning it on.  Nope, this was a funny sucking sound.  I let the disposal run for a little and realized that it was not turning my dishwater into the whirlpool that it usually does so I figured it was clogged or something.  I turned off the garbage disposal, waited for what was probably way longer than necessary but hey, I've seen the horror movies, I know what happens when you put your hand in a garbage disposal too soon, and no, I don't want to practice my horror film scream anytime soon.  So I finally reached my hand down and hit something flat.  Hmm, now what in the world could that be???  I feel around, and find a ring from a mason jar.  I feel around some more and realize that I can feel the rubber ring of the flap from the mason jar.  Well, at least I know what it is.  Now, how do I get it out of there???

I tried prying it up with my finger nail.  Didn't work.  I tried some of my heavy duty fridge magnets (Well they hold the millions of pieces of paper on the fridge so why wouldn't they pull a mason jar flap out of my drain?)  Didn't work.  I tried prying it up with a cheese spreader.  Yes, I said a cheese spreader and no, it didn't work either.  Then a light bulb went on.  I ran upstairs to the linen closet and got the plunger.  After a few failed attempts, a few moments of "how am I gonna explain this one to my husband?", and a few moments of "well now, this will make a funny blog entry", finally I had some success!  The flap popped up, I quick grabbed it before the water could suck it back in, and the water went down the drain.  So there you have it.  The next time you find yourself in a situation where there's a flap stuck in your drain, use the plunger!